This guide walks you through deploying IronCloudLLM on AWS using the official AMI. The AMI is preconfigured with Docker, so the actual application runs inside containers under /opt/ironcloudllm. By following these steps, you’ll go from zero to a working, self-hosted instance of LibreChat (IronCloud’s core interface).
1. Launching the IronCloud AMI #
1. Launching the IronCloud AMI #
- An AWS account with permissions to launch EC2 instances.
- Familiarity with basic EC2 concepts (key pairs, security groups, IAM roles).
- An existing VPC and subnet in the region you want to deploy.
- An EC2 key pair (.pem file) so you can SSH into the instance.

2. Launching the IronCloud AMI #
- Log into the AWS Management Console.
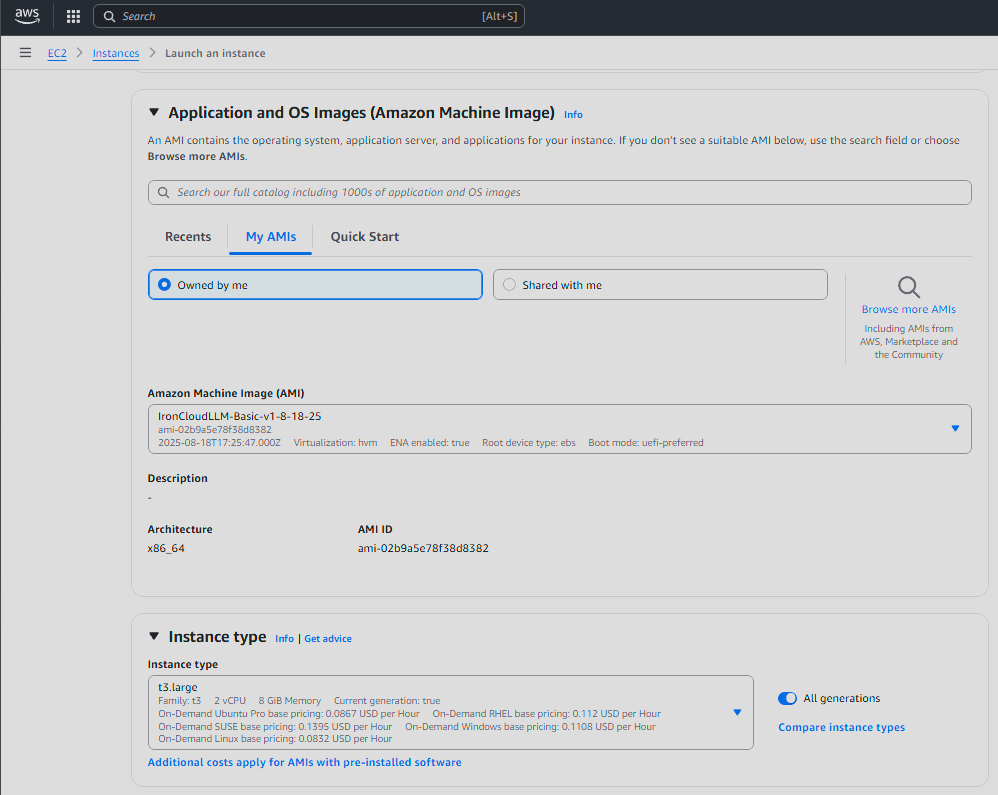
- Navigate to EC2 → AMIs.
- Search for the IronCloudLLM AMI (you will have been provided an AMI ID such as
ami-xxxxxxxx). - Click Launch Instance from Image.
- Choose an instance type. Recommended minimum:
t3.large(2 vCPUs, 8 GB RAM) for testing.m5.xlargeor larger for production use.
- Configure storage (default 50GB EBS is typically fine).
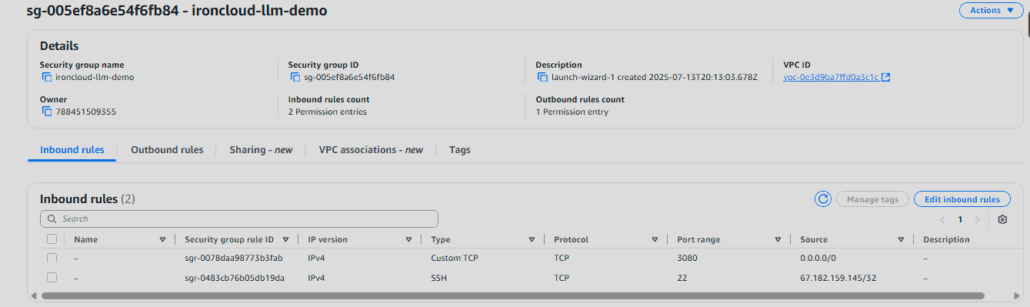
- Assign a security group that allows:
- TCP 22 (SSH) – your IP only
- TCP 3080 – LibreChat web UI
- TCP 5002 (optional) – TTS API if enabled
- Attach your key pair and launch.
3. Accessing the Instance #
Once the instance is running:
ssh -i my-key.pem ec2-user@<EC2-PUBLIC-IP>
Check that Docker is installed:
docker --version
Expected output should show a recent Docker build.
4. Directory Layout #
The AMI comes preloaded with IronCloud under /opt/ironcloudllm:
/opt/ironcloudllm
├── docker-compose.yml
├── client/
├── api/
├── rag_api/
└── .env
This setup runs multiple containers (LibreChat, RAG API, vector DB, MongoDB, etc.) all orchestrated by docker-compose.
5. Starting IronCloudLLM #
Move into the directory and start the stack:
cd /opt/ironcloudllm
docker compose up -d
This will launch:
- LibreChat frontend on port
3080 - MongoDB for chat persistence
- VectorDB (pgvector/Meilisearch) for retrieval-augmented generation
- RAG API for indexing and embeddings
Verify containers are running:
docker ps
You should see multiple containers (names like ironcloudllm, chat-mongodb, vectordb, etc.).
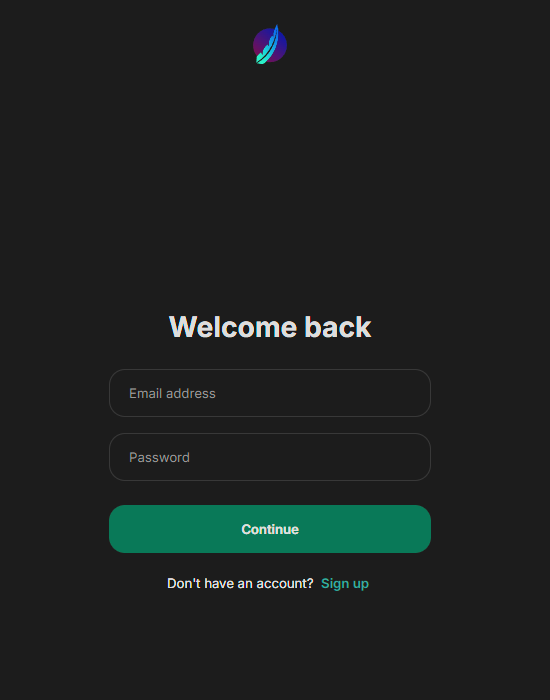
6. Accessing LibreChat #
Open a browser and navigate to:
http://<EC2-PUBLIC-IP>:3080
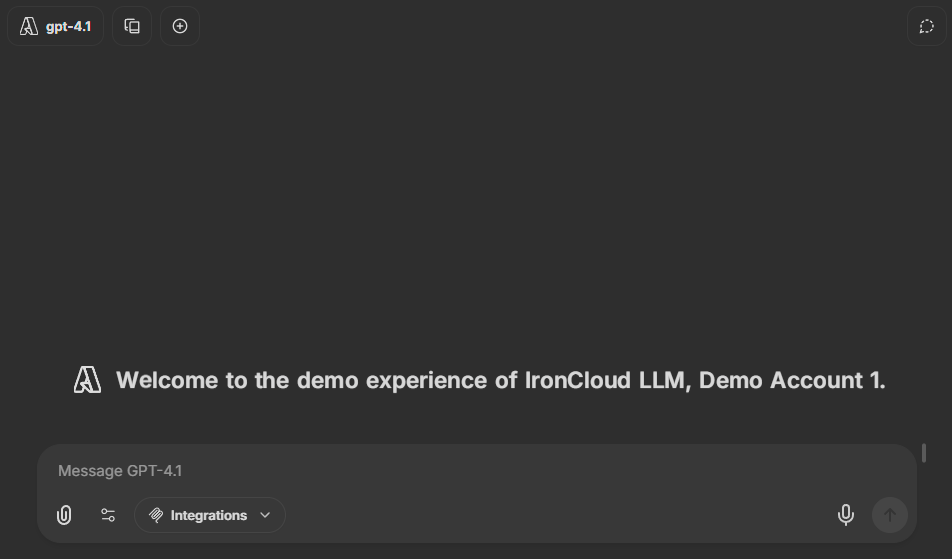
You’ll be greeted by the LibreChat UI. This is your self-hosted IronCloud environment.
Default username: admin@admin.com
Default password: password
7. Configuration #
The .env file under /opt/ironcloudllm controls your deployment. Examples:
# Example: OpenAI API Key (if using external LLMs)
OPENAI_API_KEY=sk-xxxx

# Example: AWS Bedrock settings
AWS_REGION=us-east-1
AWS_ACCESS_KEY_ID=yourkey
AWS_SECRET_ACCESS_KEY=yoursecret
After editing .env:
docker compose down
docker compose up -d
8. Logs and Troubleshooting #
Check logs for any container:
docker logs ironcloudllm
docker logs rag_api
If the stack fails to start, make sure:
- No other service is using ports 3080, 5002, or 27017.
- Your
.envfile has valid API keys if you’re connecting to OpenAI or Bedrock.
9. Stopping and Restarting #
To gracefully stop:
docker compose down
To restart:
docker compose up -d
10. Next Steps #
- Secure Access: Put the instance behind an Application Load Balancer or configure HTTPS via reverse proxy (NGINX or AWS ACM).
- Persistent Storage: Ensure EBS volumes are sized appropriately and set for auto-backup.
- Scaling: For larger orgs, consider ECS/Fargate for container orchestration.
Summary #
You’ve successfully deployed IronCloudLLM on AWS using the official AMI. The AMI boots with Docker preinstalled and a full LibreChat stack under /opt/ironcloudllm. Once launched, you can access LibreChat on port 3080, connect it to Bedrock or OpenAI, and begin using secure, self-hosted AI inside your AWS environment.


Leave a Reply
Want to join the discussion?Feel free to contribute!